One great use of Fill n’ Finish is to build up a clear finish on raw wood. Without using any of the typical film coat products such as lacquer, polyurethane or shellac, Fill n’ Finish can be built up to an amazing shine. Here’s how to do it.
Of course, with any fine finishing process starting on raw wood, the first step is to sand the surface smooth. I generally start with 60-grit and go up to 400-grit without skipping over a grit. You will get a superior surface by doing it this way, and trust me, it won’t take any longer to get the job done. You will spend less time per grit by not skipping.
Once the wood is properly prepared, its go time with the Fill n’ Finish. With raw wood I like to start with the thin formula for my first coat. Use gloves to keep from gluing yourself to the board, use a clean, soft cloth or a blue shop towel to apply the product in a circular motion until the entire surface is covered evenly. Spray on some GluDry accelerator to cure the coat quickly. Allow the board to sit for several minutes. Next step is to sand the surface with 400-grit paper. As you sand, use a low, raking light so you can see how the Fill n’ Finish has covered and where it might be built up too thick. Level the surface.
With the initial coat cured, apply a second coat in the same way – this time I recommend the regular formula (Blue) rather than the Thin Fill n’ Finish (Orange). Spray a light dusting of the accelerator and set the board aside for at least 15 minutes. When you are confident the Fill n’ Finish is cured, you are back to sanding. Again, level the coat so that it is flat with no runs or defects to be seen. Now apply a third coat.

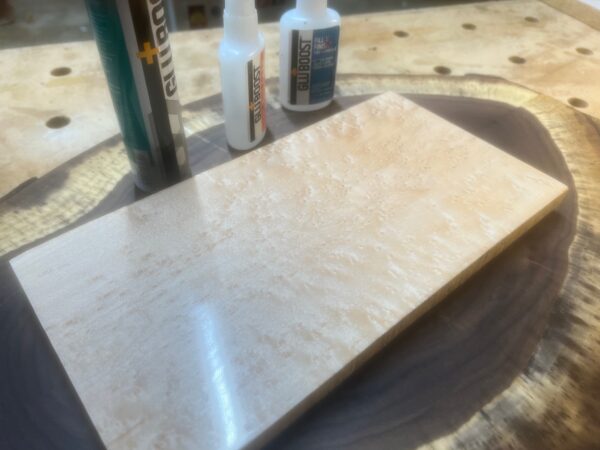
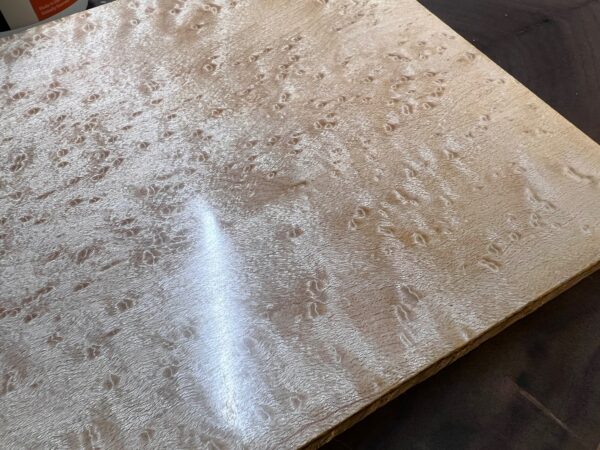
This birds-eye maple board has a gloss Fill n’ Finish surface.
You now have a reasonably thick and ultra durable layer of Fill n’ Finish on your wood. With the surface level smooth, use a series of micro mesh sanding pads to bring up the shine. Start with 1500-grit and work up to at least 8,000-grit. At that point you will have a shiny smooth surface that provides excellent chatoyance. If you are looking for a bit less gloss, stop a few pads earlier. And if you think that your work is already too shiny, just grab a micro mesh pad of a lower grit and sand away and you’ll have a satin gloss finish in no time.

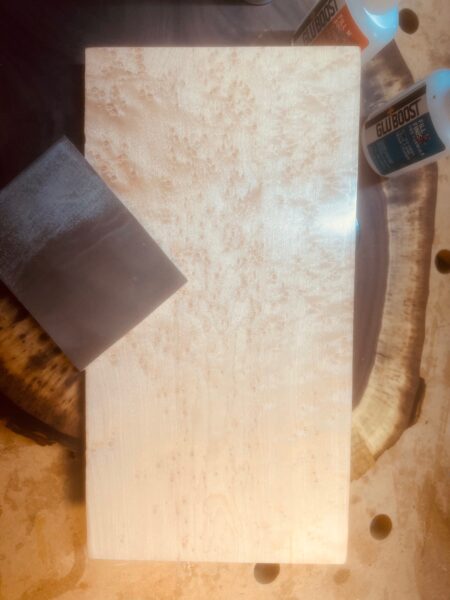
The top of the board has a gloss finish, the lower section of the board has been sanded to provide a semigloss surface.
Another benefit of a Fill n’ Finish surface is that you can buff it to an incredible shine. To do that, sand up to 12,000 grit and then use a polishing compound and a buffer to raise the shine. It will look like a million bucks.

Rob Johnstone- Master Woodworker
Manufacturers Note
GluBoost Loves Wood! GluBoost products are highly specialized cyanoacrylate adhesives, accelerators, tints and accessories and are particularly optimized for Lutherie, Woodturning and Woodworking. While GluBoost products bear some resemblance to other products, GluBoost formulas elevate performance high above other CA products, common super glues, accelerators, and color tints for Lutherie, Woodturning and Woodworking.
We thank you for your many years of patronage and we look forward to bringing you many more years of innovative, game changing products.
– The GluBoost Team
Let’s say that you used GluBoost Fill n’ Finish and got a super smooth very shiny finish. But then you thought to yourself, can I...
Read More →Sometimes when you are designing a piece of furniture, a door or a wall panel, you will often need accent pieces to add a bit...
Read More →One great use of Fill n’ Finish is to build up a clear finish on raw wood. Without using any of the typical film coat...
Read More →GluBoost Fill n’ Finish makes a great finish on many projects. (Body) For some woodworkers, applying a finish is that tedious task that you...
Read More →